It is how we remember the past and keep our cultural heritage alive. It is how we create new memories while remembering old ones. Some traditions have prevailed for thousands of years while others have gone away. Some are even resurrected from the grave and given a new life. As humans we crave for belonging and to find meaning and symbolism in our lives. We use traditions to connect and give meaning to our existence. So today I present to you a tradition from my family. One that has traveled many years and thousands of miles. It has withstood the test of time, war, famine, and countless periods of relocation to say the least. It is the humble tradition of making pumpkin preserves during the fall harvest. It is the epitome of slow food and hearkens back to a time when it was necessary to preserve food in order to survive the winter. Make sure to set aside some time if you plan on making the preserves. You do not need to hover over the pot while it cooks, but don't forget about it either. The amounts of ingredients in the recipe can change on a number of factors depending on pumpkin size, pot size, etc. So keep this in mind and if you have any questions, I am more than willing to help so give me a shout.
Traditionally, this is served with coffee as "spoon sweets" with other confections when there is company or during breakfast.
Pumpkin Preserves
by Nathan Kibarian & Family
Completion time : 2-3 days
Yield: 1 sugar pumpkin, about 1.5 Kg
 |
| Finished Pumpkin Preserves |
Ingredients:
1 sugar pumpkin (about 1-2 Kg)
Pickling Lime (food grade Calcium Hydroxide) 1/2 cup per gallon of water
Water (as needed)
Lemon Juice (10 oz per gallon of water)
Water (as needed)
2 Cinnamon Sticks
12 cloves, whole
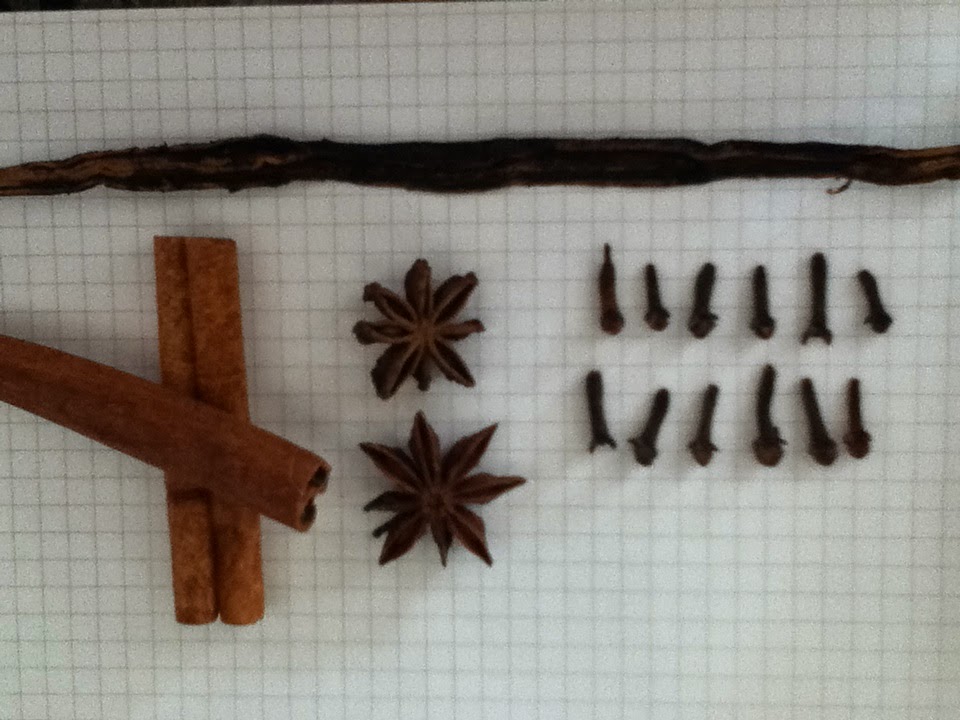 |
| Clockwise from top: Vanilla bean, cloves, star anise, cinnamon. |
2 Star Anise pods
1 vanilla bean, scraped
1 Lemon, cut in half, juiced
Water (as needed)
Sugar, Granulated
Equipment:
Cutting-board
Large knife
Peeler
Large spoon
Large bowl (made of a non-reactive material)
Colander
Measuring cup
Large, non-reactive stockpot
small pot
candy thermometer
Jars, as needed to store preserves
Before we begin:
You can use larger pumpkins to make the preserves as well; however, the texture will not be as fine grained as a smaller sugar pumpkin. You could also use any other variety of winter-squash or heirloom pumpkins. One of my favorite pumpkins to use for this recipe is the rouge vif d’Etampes which is an heirloom pumpkin originating from France. Whatever you end up using, make sure it is at its peak of ripeness and free of spoilage and non-characteristic blemishes (some squash varieties naturally are warty and rough, this is okay). Also, the reason why the cooking process is so long is because you need to replace the water in all the cells in the pumpkin with water that is bound by sugar. This lowers the water activity, thus reducing and ultimately preventing spoilage due to bacterial growth. There is a great deal of science that goes into this process but I won't bore you with that now.
1. Cut the pumpkin in half and clean the inside. Use a spoon to scrape the inside cavity clean. Save seeds for roasting if desired.
 |
| Cut and scraped pumpkin (step 1) |
2. Peel the skin off the pumpkin.
 |
| Peeled Pumpkin (step 2 |
3. Dice the pumpkin into 2 cm cubes and place into a large enough non-reactive bowl to hold all the pieces
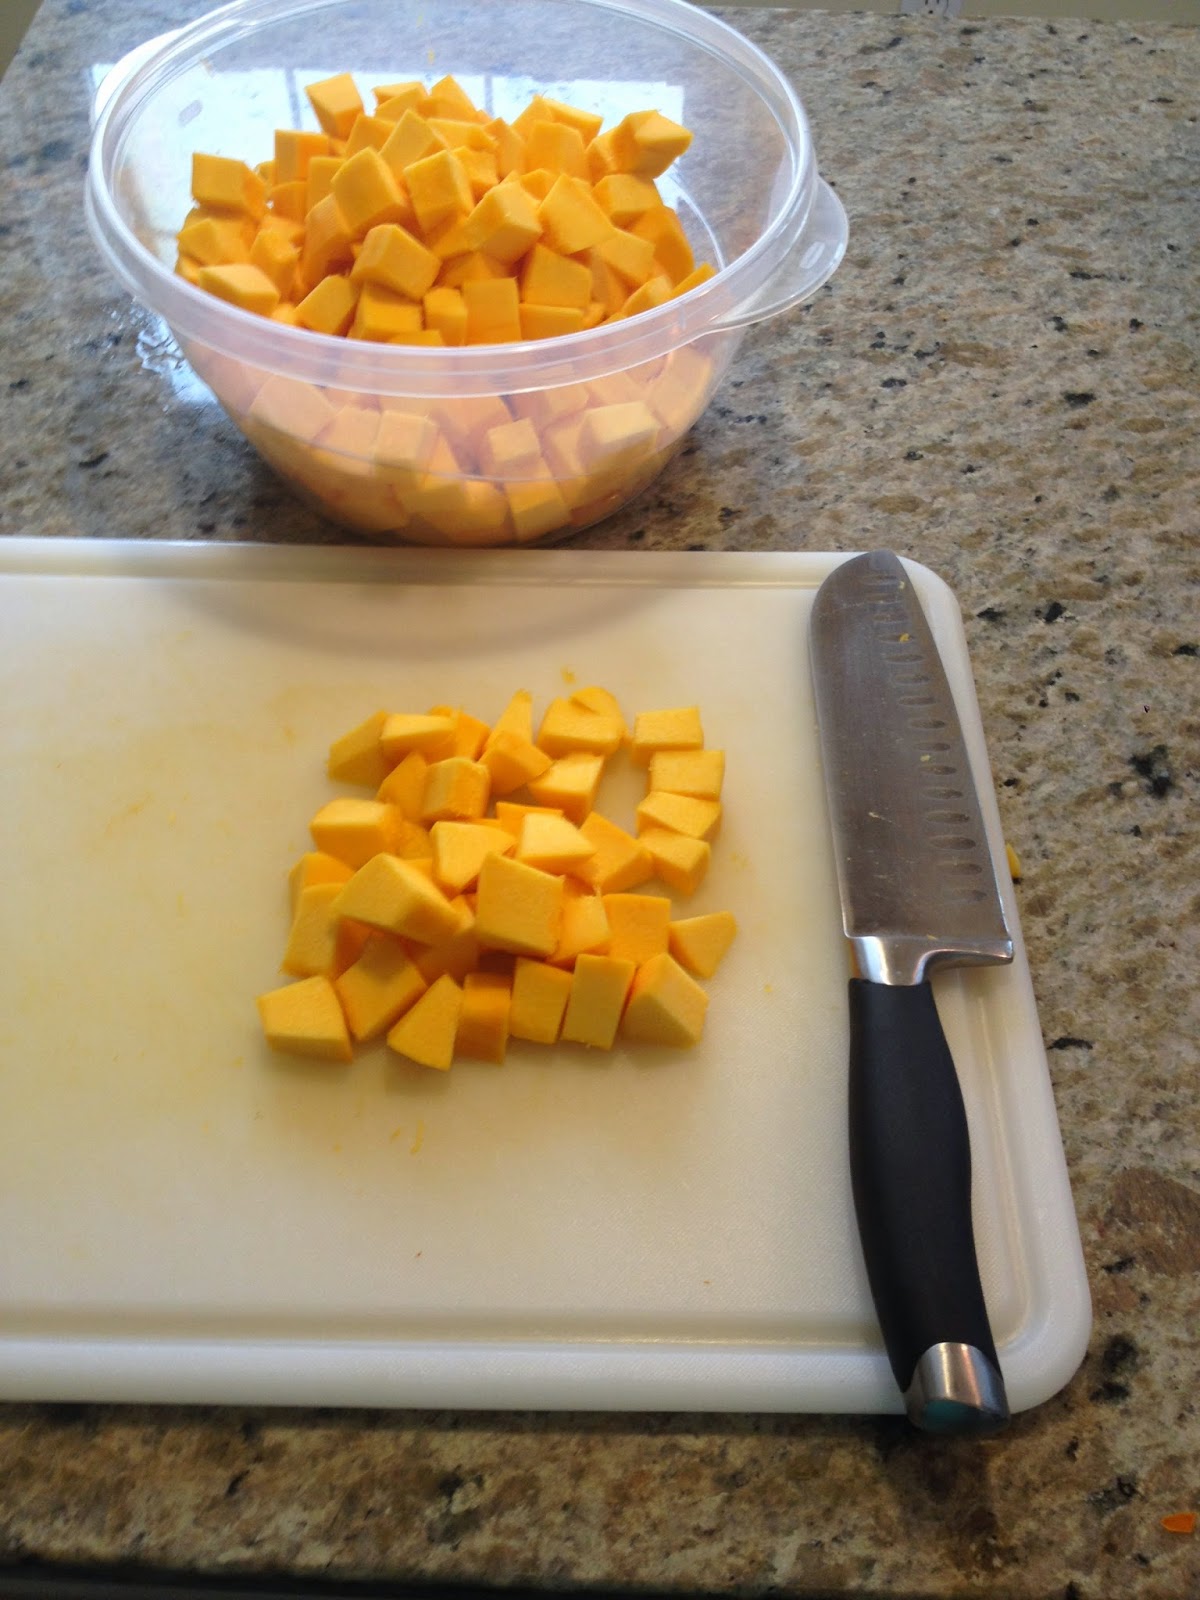 |
| Diced Pumpkin (step 3) |
4. Measure and pour enough water over the pumpkin cubes to cover with an additional 2cm of water. Take note of the amount of water used.
 |
| Measuring water (step 4) |
5. Remove about 3 cups of water and measure the appropriate amount of pickling lime into this water. Stir and pour this slurry over the pumpkin.
-I ended up using 1 gallon of water and 1/2 cup of pickling lime for my pumpkin.
 |
| Pickling Lime (step 5) |
 |
| Pickling Lime Solution with pumpkin (step 5) |
6. Place a plate over the pumpkin to weigh the pieces down to keep then submerged at all times.
 |
| Plate placed on Pumpkin cubes (step 6) |
7. Set aside at room temperature for a minimum of 12 hours. 24-36 hours would be best. Stir every 6-8 hours to redistribute the lime throughout the water. It will naturally settle to the bottom, do not worry.
8. Once the pumpkin is ready, boil a pot of water with lemon juice 10oz lemon juice per 1 gallon water (enough to submerge all the pumpkin).
9. As the lemon water is coming to a boil, thoroughly rinse the pumpkin cubes. Drain the pickling lime water solution and rinse at lease 5 times. It is very important to remove all of the residue from the pumpkin's surface.
-Caution: Pickling lime has a very high pH of about 12. It will react with aluminum and can stain surfaces with a chalky residue. Do not worry though, when used correctly it is perfectly safe to consume.
 |
| Thoroughly rinse the pumpkin (step 9) |
10. Once the lemon water is at a rolling boil, put the cleaned pumpkin cubes in the solution and turn off the heat. Cover the pot and set aside to cool. It will take a few hours to cool to room temperature but this is an important step to creating the characteristic texture and color of this food.
11. When the pumpkin reaches room temperature, drain all the water from the pumpkin.
12. In a clean stockpot create a solution of sugar and water in a 4;1 ratio. 4 parts water to 1 part granulated sugar. Heat to a simmer to dissolve all the sugar. Then cut and juice 1 lemon and put into the syrup (juice and the two lemon halves). Put the drained pumpkin cubes into the syrup. Also add the spices into the syrup at this time.
 |
| Pumpkin in syrup beginning to simmer (step 12) |
-If you would like a paler color, do not add the spices until the very end of the cooking process as they darken the syrup.
13. Simmer the pumpkin in the syrup for about 8 hours, continually replenish the water in the pot to the amount you started with throughout the cooking process.
14. After 8 hours, make a syrup with 2 cups sugar and 1 cup water. Add this to the pot and continue cooking for another 6 hours. Replenish with fresh water when needed.
14. Again, make a syrup solution of 2 cups sugar to 1 cup water and pour into the pot. Continue cooking for another 6 hours.
15. To check if the pumpkin is ready, remove a cube from the pot and allow it to cool. It should have a nice sheen and should be slightly translucent. If the pumpkin is not ready, continue to simmer in the syrup while replenishing the water until it is ready. Once the pumpkin has reached this stage, remove the pumpkin from the syrup and place into another heat-proof container. Continue cooking the syrup on high while measuring the temperature with a candy thermometer. Cook to 114°C and put the pumpkin back into
syrup.
 |
| Boiling Syrup (step 15) |
|

 |
| Pumpkin added back to syrup (step 15) |
16. At this point you can either can the preserves so
they can be shelf-stable for up to 12 months or place in containers
and keep refrigerated.
17. Enjoy with a cup of Armenian coffee...or as I just recently discovered, on a fresh slice of baguette with blue cheese. It is a match made in heaven.
No comments:
Post a Comment